Table of Contents
1. How to Create a Payroll Schedule?
1.2 Assign Payroll to an Employee
2. How to Add Deductions?
2.1 Assign Deductions to an Employee
3. How to Add a Contribution?
3.1 Assign Contribution to an Employee
4. How to Add Allowances?
4.1 Assign Allowances to Employee
5. Salary Template
5.1 Assign Salary Template to an Employee
6. How to Import Payroll Elements?
7. How to Update Payroll Elements Data in Bulk?
How to Create a Payroll Schedule?
Creating a payroll schedule is an essential task for any business owner or HR manager. It ensures that employees are paid on time and accurately, which is crucial for maintaining a positive work environment. Ojoor makes payroll processing for your company simple and error-free. Ojoor payroll automates all wage computations, follows local regulations, and ensures that all regulatory requirements are met.
You can schedule a payroll according to your own required time. Ojoor is a simple process that involves determining the payroll period, setting payroll dates, calculating employee hours and gross pay, deducting taxes and other withholdings, and creating payroll reports.
By following these steps, you can ensure that your employees are paid accurately and on time, which is essential for maintaining a positive work environment. In this article, we will guide you through the steps to create a payroll schedule in Ojoor.
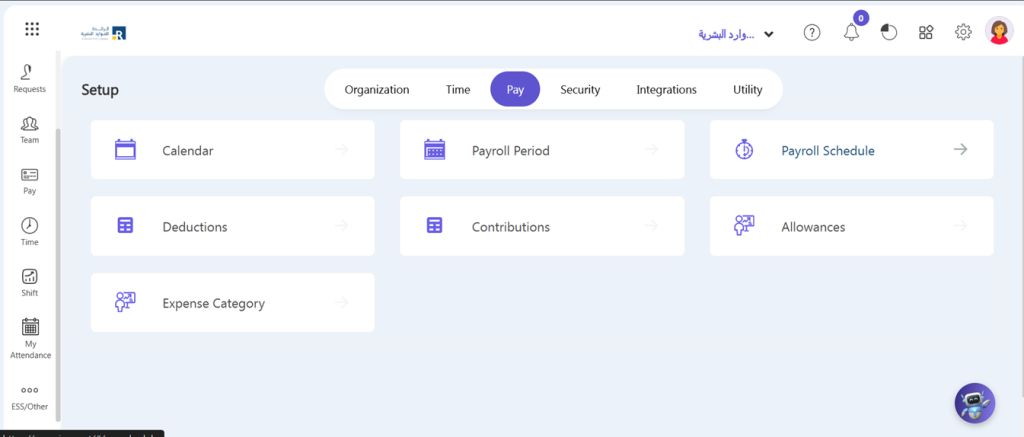
- Go to Setup -> Pay-> Payroll Schedule
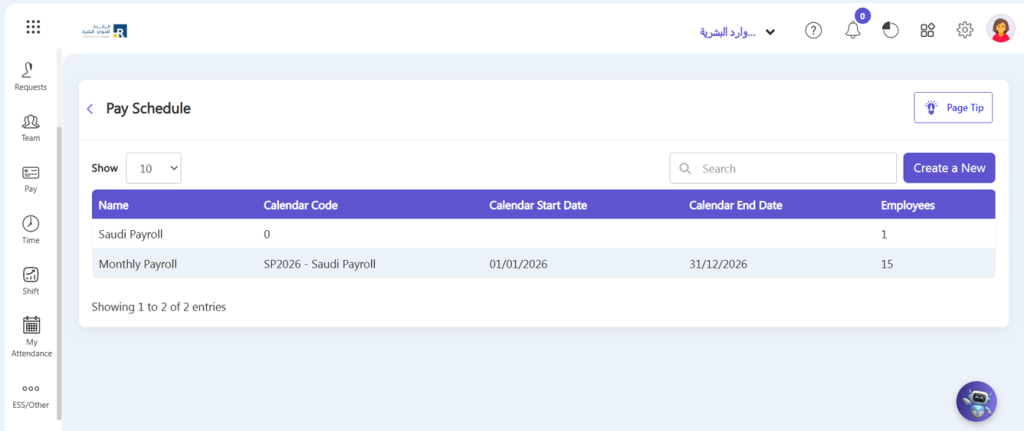
- Select “Create a new” in the top right corner.
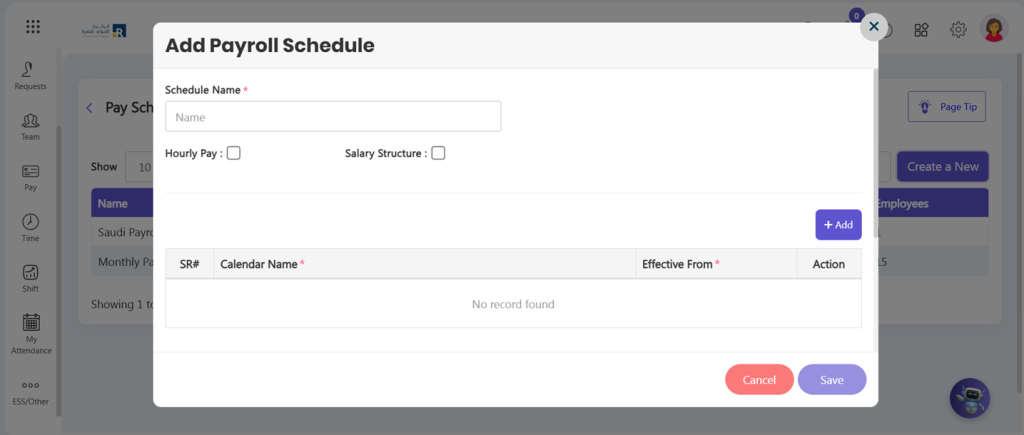
- Pay Period: Your payment period is the length of time that your payment covers. Bi-weekly, or monthly.
- Holiday Payments: If your payment date falls on a holiday, your payment will be processed on the next business day or before holiday.
- Start Date: The start date of your payment period is the first day that your payment covers. This is important to know so that you can plan your budget accordingly.
- End Date: The end date of your payment period is the last day that your payment covers. This is important to know so that you can make sure that you have enough funds to cover your expenses until your next payment.
- Payment Date: Your payment date is the day that your payment will be processed. This is important to know so that you can make sure that you have enough funds in your account to cover your payment.
- Default: If you want to make monthly salaries then check this checkbox.
- Hourly Pay: If you want to make hourly salaries then check this checkbox.
- Fill in the required fields.
- Then click Save button.
Assign Payroll to an Employee
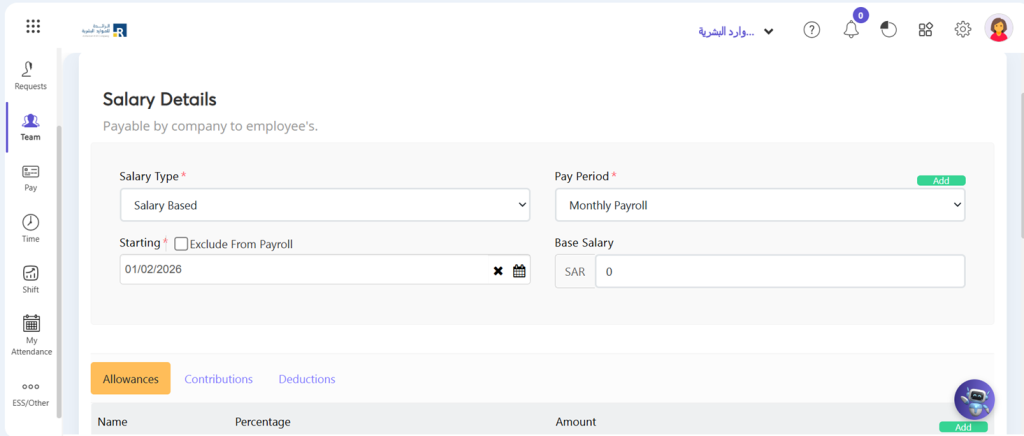
- Go to Team > Select any employee > Edit profile > Salary
- Click Pay period, drop down menu will be open. Select payroll and click save button.
How to Add Deductions?
Adding deductions in payroll is an important aspect of managing employee compensation. Ojoor also has a deduction attribute that allows you to apply various types of deductions to an employee’s salary. You can edit an existing deduction well as create a new deduction. With Ojoor, the process is simple. Here’s how to add deductions in Ojoor:
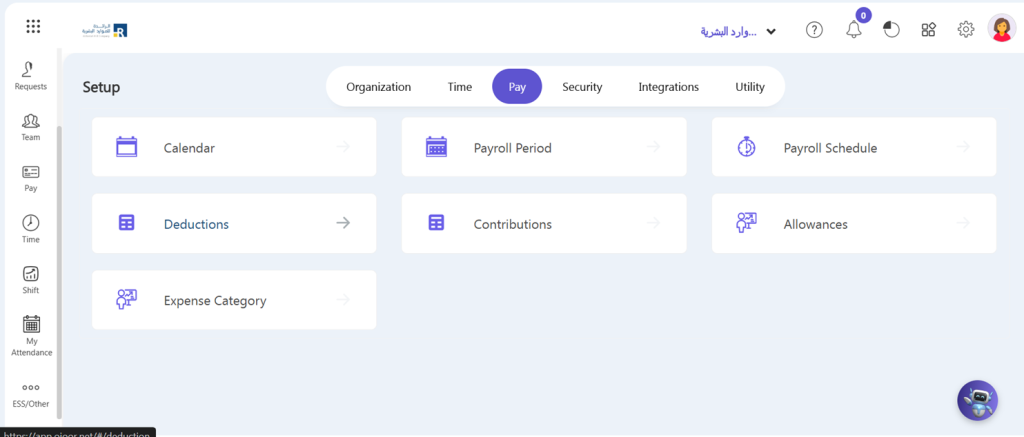
- Go To setup > Pay > Deduction
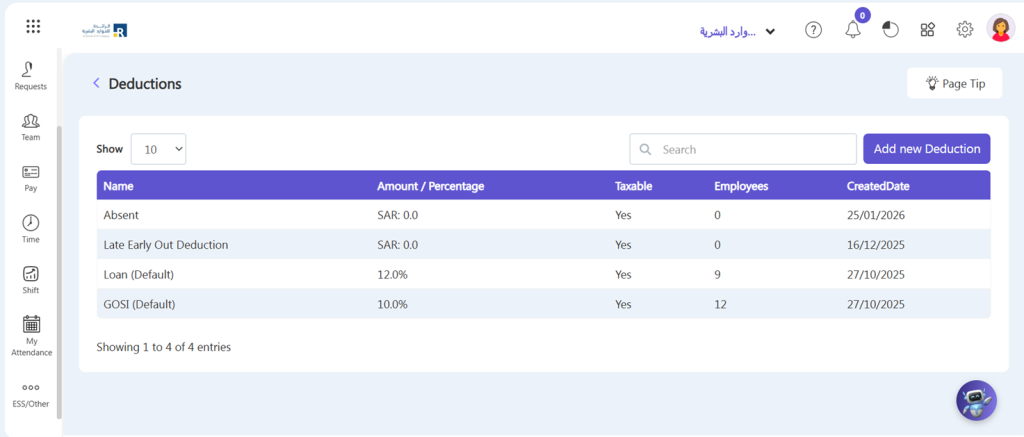
- Select “Add new Deduction” in the top right corner.
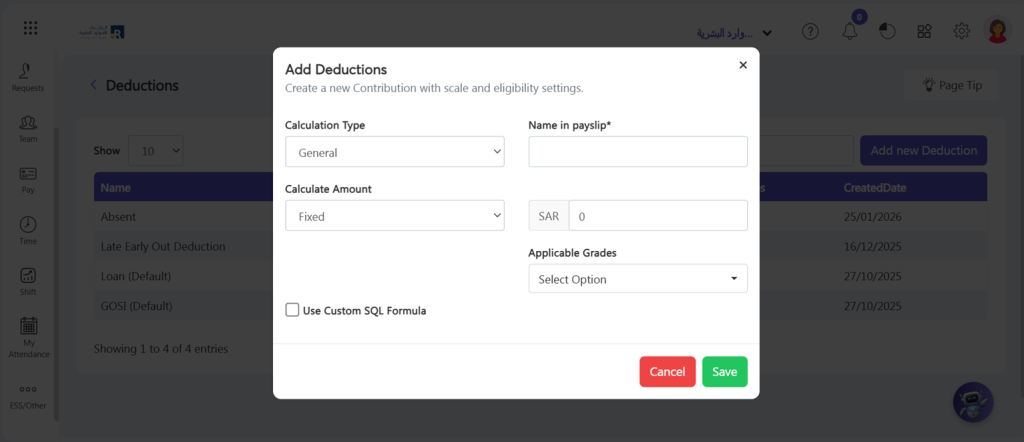
- “Name in payslip” refers to the name that appears on your payslip, which is a document that shows your earnings, deductions, and net pay for a specific pay period. It is important to ensure that your name is spelled correctly on your payslip to avoid any confusion or issues with your employer or financial institution.
- Calculate Amount: The payment will be deducted from the salary as a fixed amount or as a percentage of the salary.
- Fill in the required fields that appear on the screen and then click on Save button.
Assign Deductions to an Employee
- Go to Team > click on any employee > click on the top right corner on edit profile
- Click on Salary.
- Click on Add button.
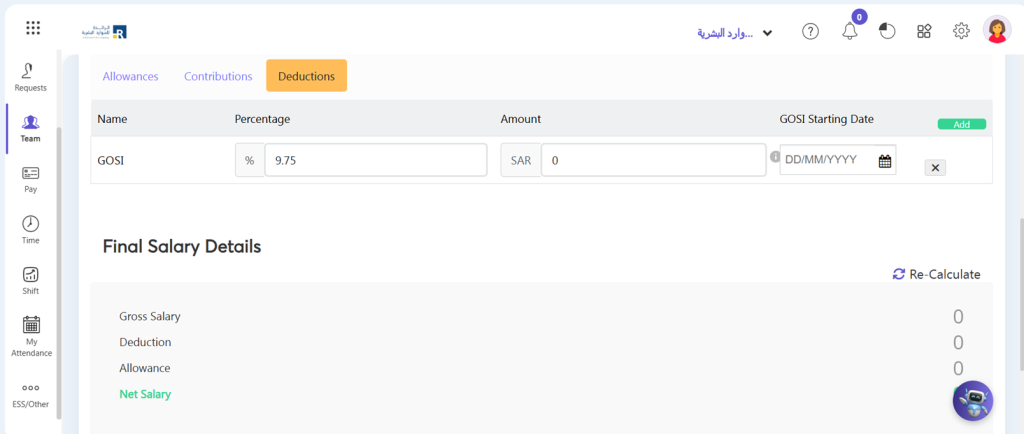
- List of Deduction will be show. You can select more than one deduction.
- Click on Save button.
How to Add a Contribution?
Creating contribution is an important aspect of managing employee compensation. Ojoor also has a contribution attribute that allows you to apply various types of contributions to an employee’s salary. You can edit an existing contribution as well as create a new contribution. With Ojoor, the process is simple. Here’s how to create contribution in Ojoor:
- Go To Setup > Pay > Contribution.
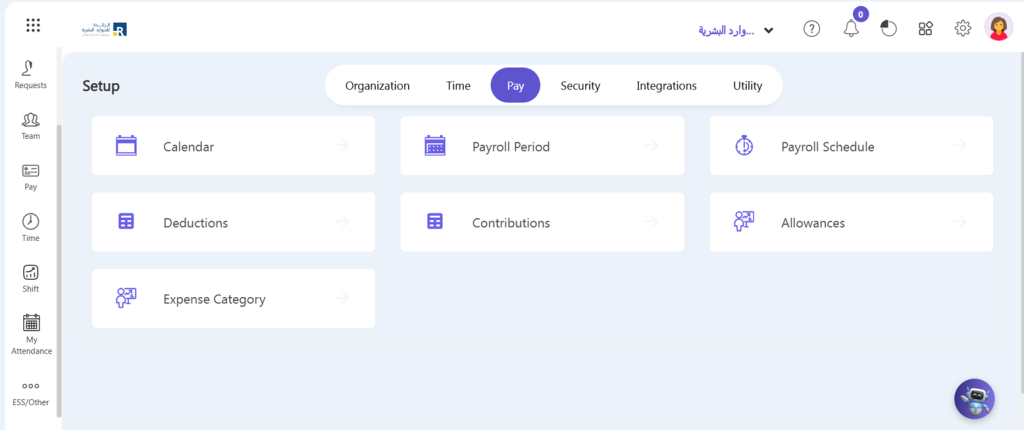
- Select “Add new Contribution” in the top right corner.
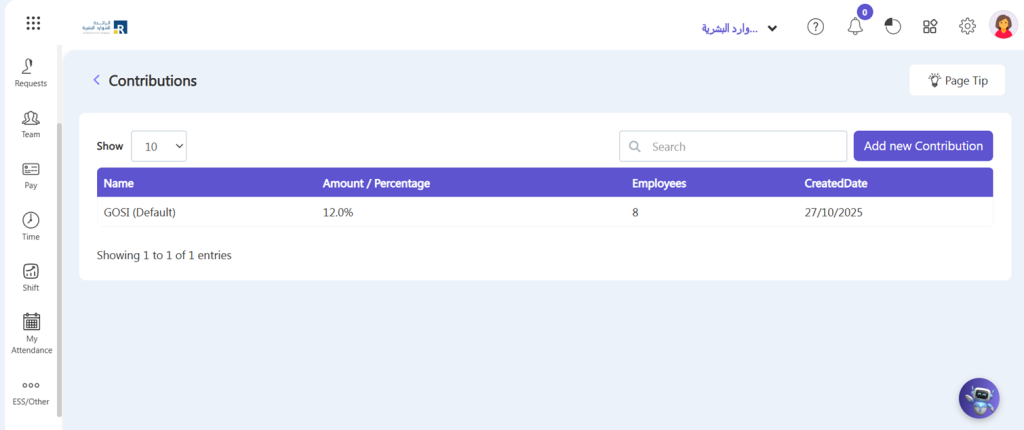
- “Name in payslip” refers to the name that appears on your payslip, which is a document that shows your earnings, deductions, contributions and net pay for a specific pay period. It is important to ensure that your name is spelled correctly on your payslip to avoid any confusion or issues with your employer or financial institution.
- Calculate Amount: The payment will be contributed from the salary as a fixed amount or as a percentage of the salary.
- Fill in the required fields that appear on the screen and then click on Save button.
Assign Contribution to an Employee
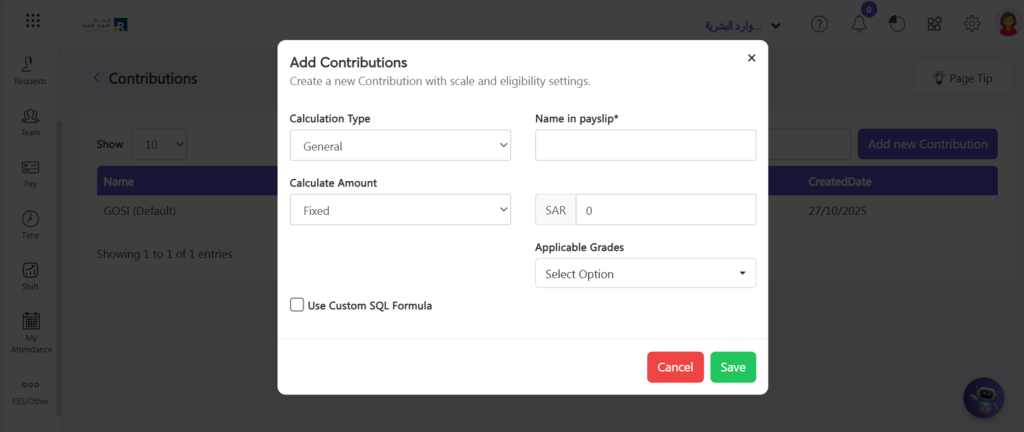
- Go to Team > click on any employee > click on the top right corner on edit profile
- Click on Salary.
- Click on Add button.
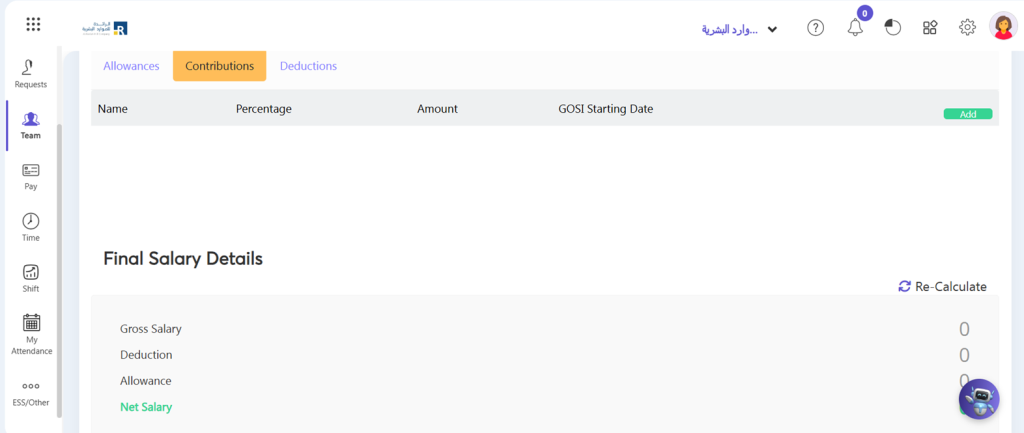
- List of Contribution will be show. You can select more than one contribution.
- Click on Save button.
How to Add Allowances?
Different types of allowances can be added to an employee’s income using Ojoor. You can edit and reuse an existing allowance as well as create a new allowance.
- Go to setup > Pay > Allowance
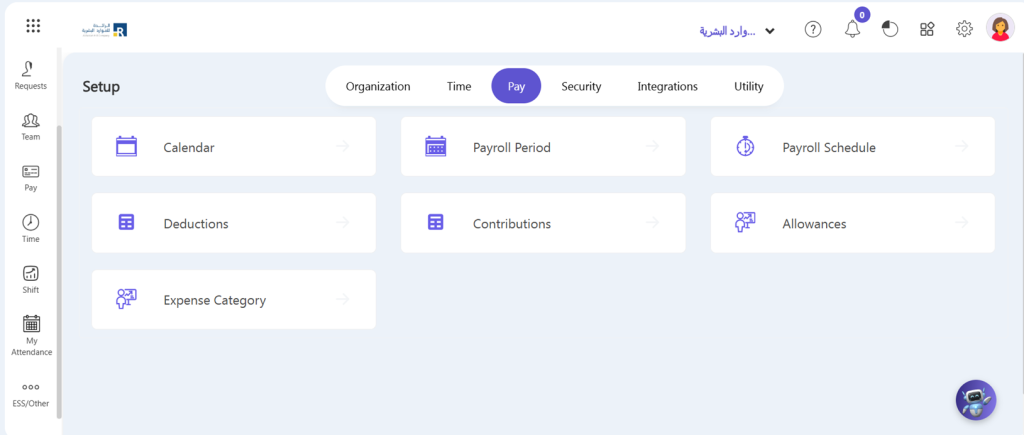
- Select “Add new Allowance” in the top right corner.
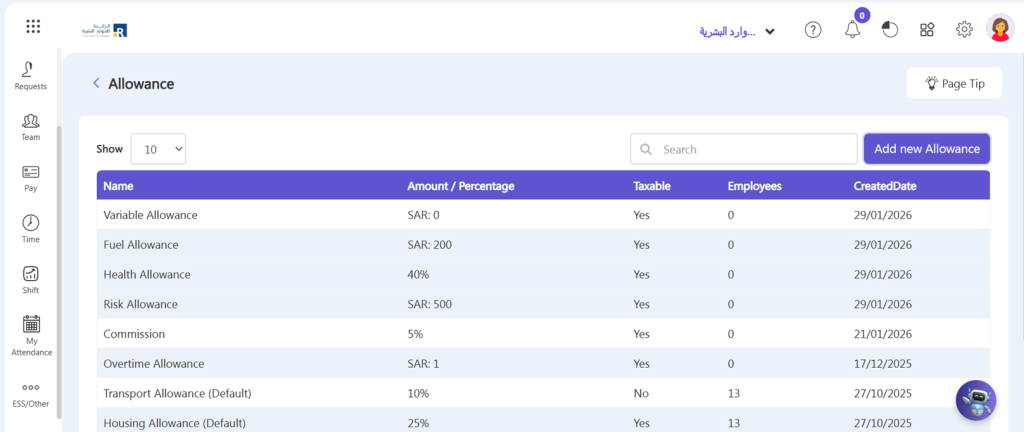
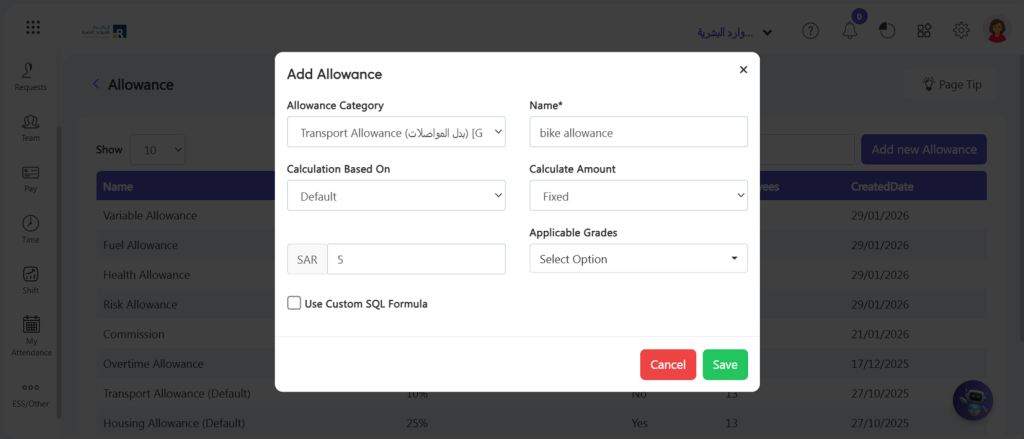
- Allowance Category: Select allowance category which you can create in Master Data.
- Name: When setting up an allowance category, you will need to give it a name. This name should be descriptive and easy to remember. For example, if you are setting up an allowance for travel expenses, you could name it “Travel Allowance.”
- Calculation Based On: You will also need to specify what the allowance will be based on. This could be a fixed amount or depend on employee present days.
- Calculate Amount: The Allowance Amount feature allows you to choose the basis on which the allowance will be calculated. You can choose to calculate the allowance based on a fixed amount or a percentage of the employee’s salary.
- Fill in the required fields that appear on the screen and then click on Save button.
Assign Allowances to Employee
- Go to Team > click on any employee > click on the top right corner on edit profile
- Click on Salary.
- Click on Add button.
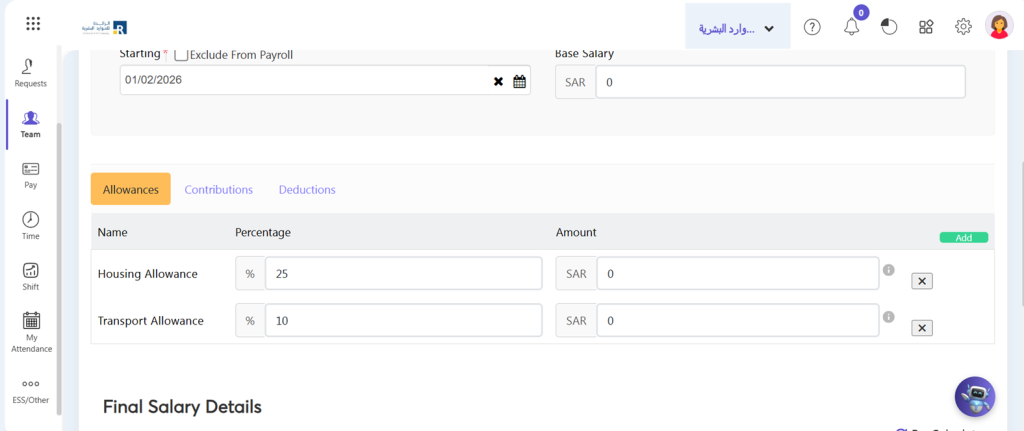
- List of Allowances will be show. You can select more than one allowance.
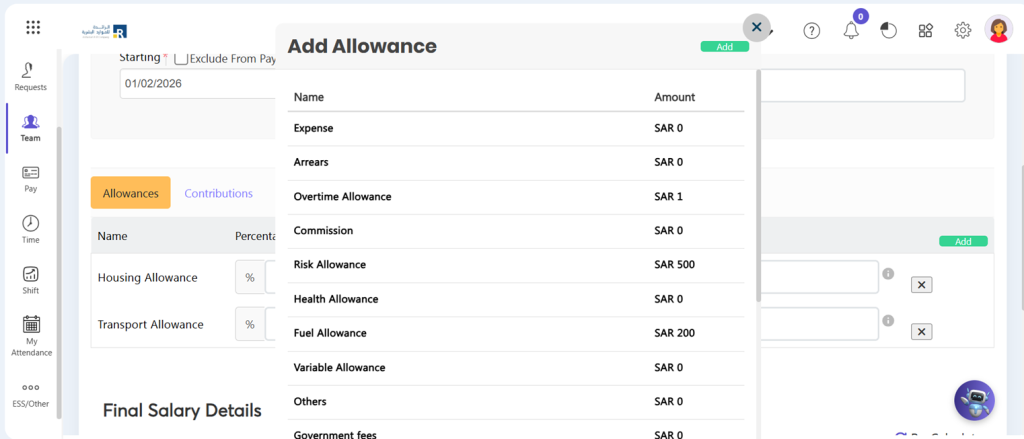
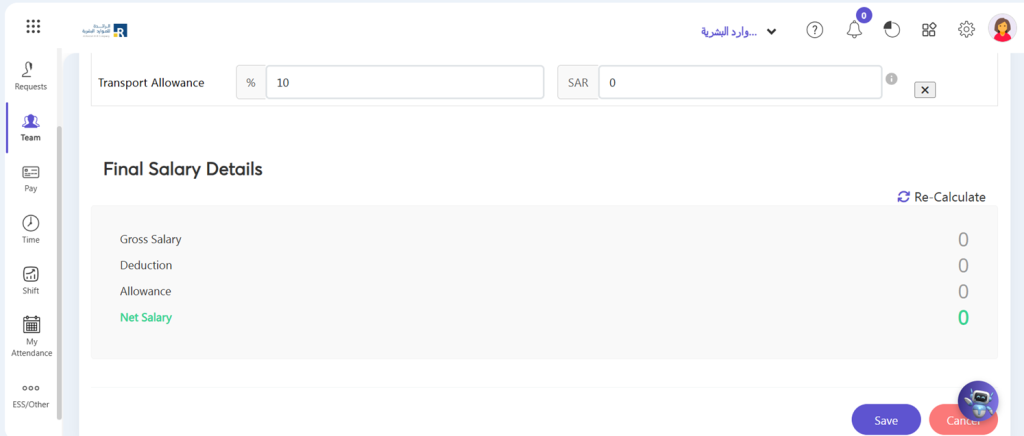
- Click on Save button.
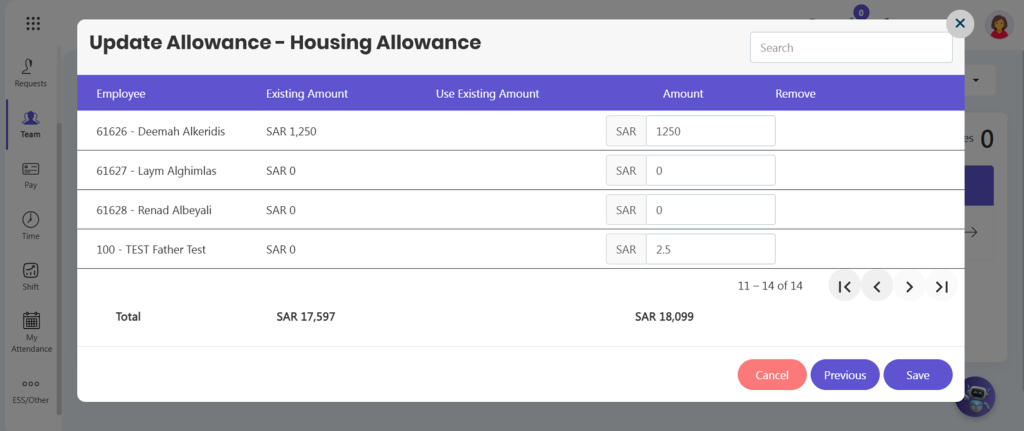
How to Update Payroll Elements Data in Bulk?
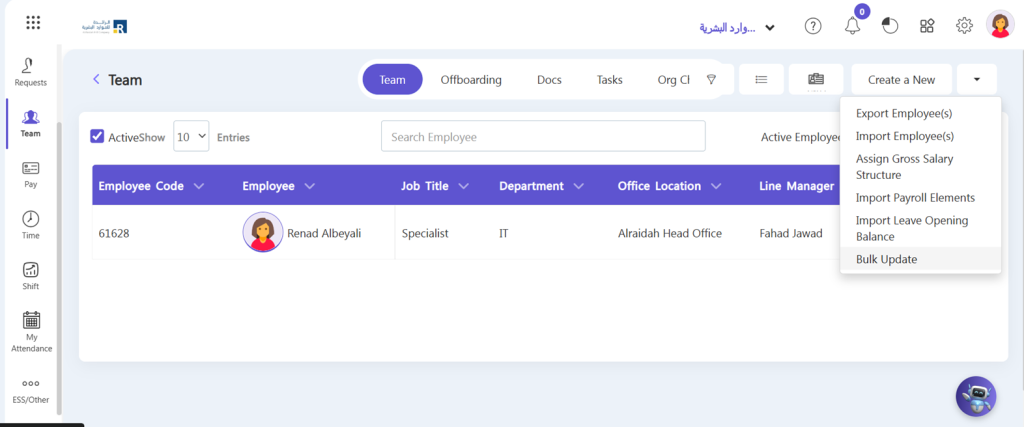
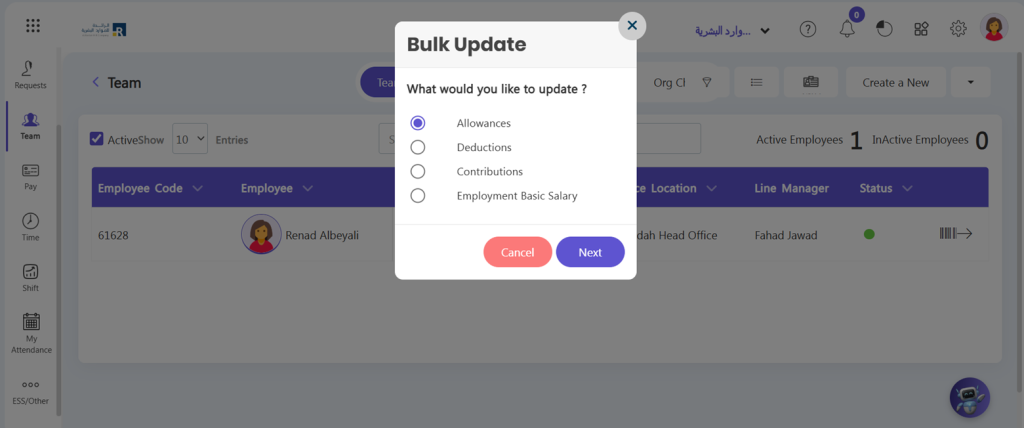
Ojoor provide easiest way to update allowances, contribution and deductions in a single click. For this,
- Go to Team > Click on drop down arrow located besides Create a new button.
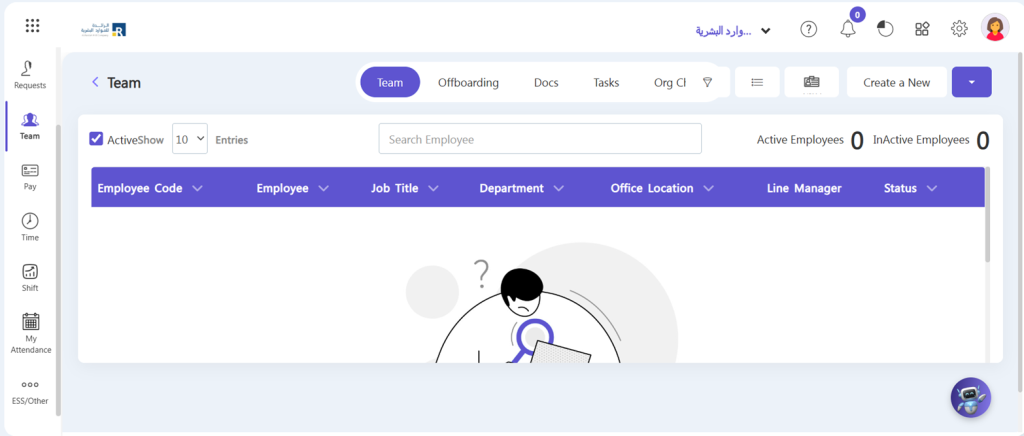
- Click on Bulk Update.
- Dialogue box will open. Click on Next button.
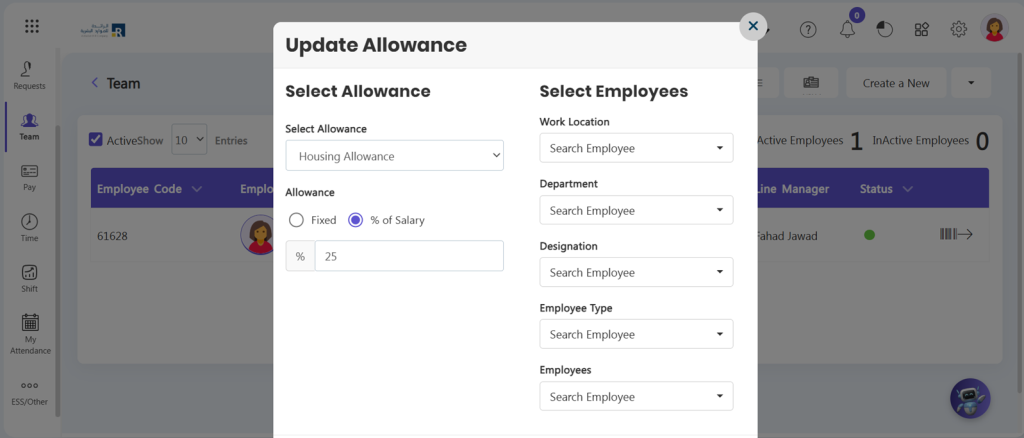
- Fill in the required fields.
- Click on Next button.
- Click on Save.