Table of Contents
- How to Create Shift?
- Give Employee Flexibility to Clock in and Clock out
- How to Create Flexible Shift?
- How to Create OFF Day Shift?
- How to Assign Shift Roaster to Employees?
- 1. Using Shift Calendar:
- 2. Using Shift Permanent:
- Time Status in Ojoor
- How to Create a Time Status
How to Create Shift?
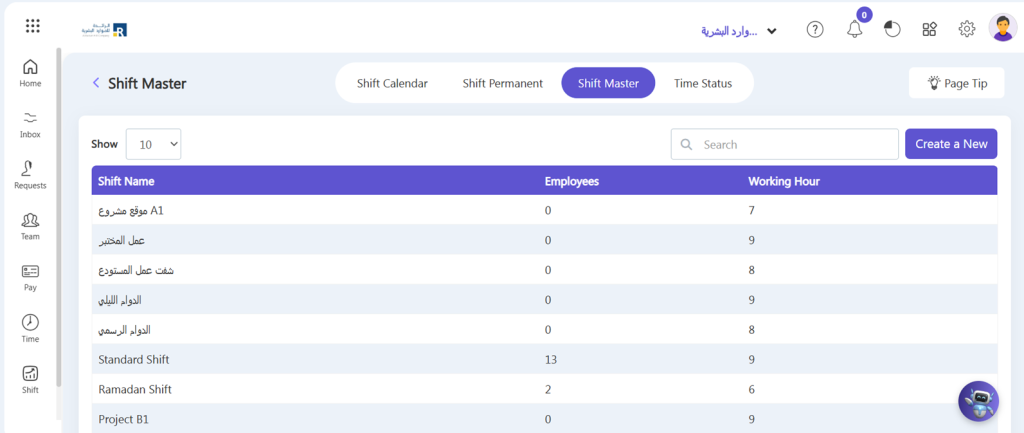
Creating shifts in Ojoor is an easy process. Here you can define the shift name, shift timings overtime end limit/maximum overtime limit in this section. Follow these simple steps to configure your shifts:
- Go to Shift => Shift Master => Create a New.
- Enter the shift name and other fields.
- Night Shift
Select this checkbox if the employee is assigned to an overnight shift. - Exclude Break Time from Working Hours
Enable this option to calculate working hours and attendance hours
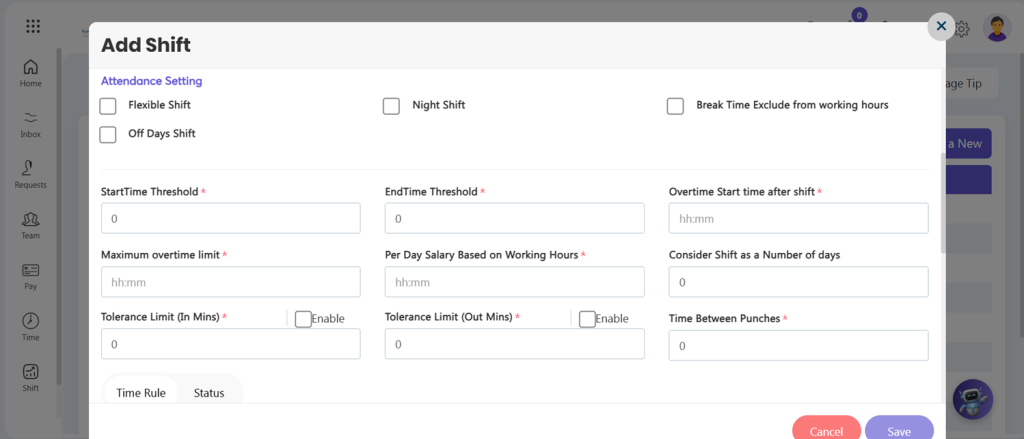
- Set overtime start time after shift end in ‘Overtime Start time After Shift’ field and maximum overtime limit in ‘Maximum Overtime Limit’ field.
- Enter a number in ‘Consider Shift as several Days’ based on your requirements. For example, if you enter ‘2’ and your shift duration is 9 hours, the system will divide it into 4.5 hours per day (9 ÷ 2).
- Select the days of the week when the shift will be active for Working Days.
- You can configure different shift timings for different working days.
- Click the Save button and your new shift has been created and will show on the Shift panel.
Give Employee Flexibility to Clock in and clock out
Certainly, the flexibility to set start and end threshold times for employee shifts is a useful feature. This allows employees to clock in before the official start time and clock out after the official end time within defined limits. Here’s how you can describe this feature:
This feature provides employees with the ability to clock in and out with flexibility around their scheduled shift times. The system allows for:
- Start Threshold Time:
- Employees can clock in a specified duration before their scheduled shift starts.
- This threshold time is set by administrators and provides flexibility for early arrivals.
- End Threshold Time:
- Employees can clock out a specified duration after their scheduled shift ends.
- This threshold time is set by administrators and allows for late departures.
- Write Start Threshold Time and End Threshold Time
- Click save button.
How It Works:
- Clocking In:
- Employees can clock in anytime within the Start Threshold Time before their scheduled shift begins.
- Example: If an employee’s shift starts at 10:00 AM and the Start Threshold Time is set to 120 minutes, the employee can clock in any time from 8:00AM onwards.
- Clocking Out:
- Employees can clock out anytime within the End Threshold Time after their scheduled shift ends.
- Example: If an employee’s shift ends at 6:00 PM and the End Threshold Time is set to 300 minutes, the employee can clock out any time until 11 PM.
How to Create Flexible Shift?
You can set a flexible shift if you want to track your employees ‘Early out’ status only when they have fewer working hours or display a ‘Present ‘icon if they have completed their required working hours.
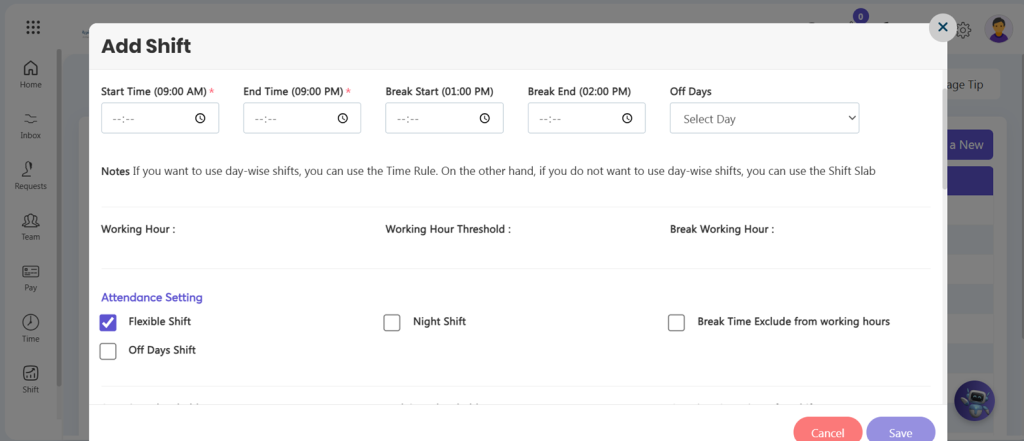
- Go to Shift => Shift Master => open shift
- Check the checkbox of Flexible Shift
- Click Save.
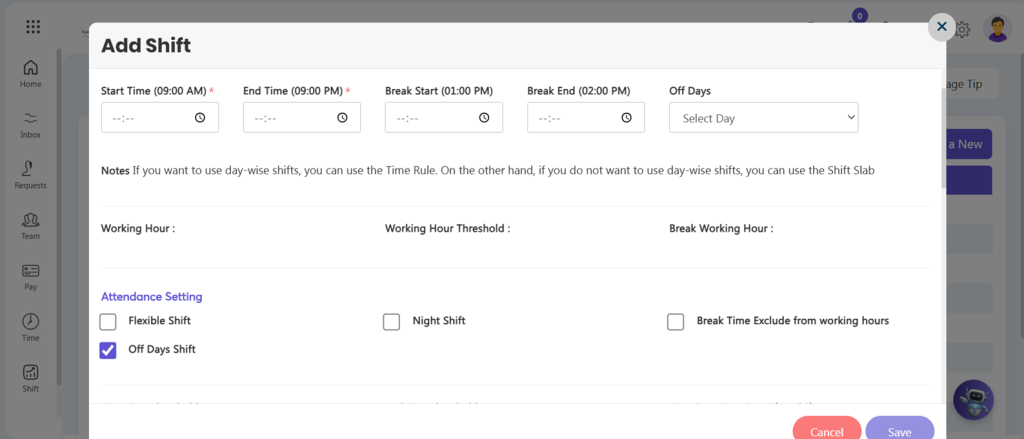
How to Create OFF Day Shift?
If your employees have different off days, you can create Off Day Shift separately.
- Go to Shift => Shift Master => Create New
- Fill in the mandatory fields
- Enable the Off Day Shift checkbox
- Click Save
How to Assign Shift Roaster to Employees?
Some organizations may need to define separate shifts for employees other than the default shift for a set of days. To add multiple shifts first, create shifts according to shift time. You can create a shift from Shifts. To assign a different shift to employees:
There are two ways to Assign shift i.e. Shift Calendar and Shift Permanent
Using Shift Calendar:
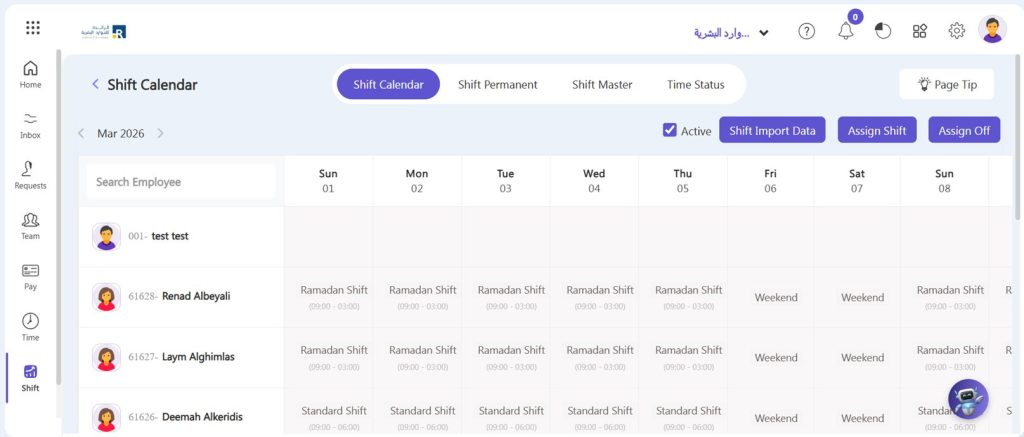
Use Shift Calendar option when you want to assign a shift for a specific duration only. For example, if an employee is required to work the evening shift for two weeks due to a project and will then return to their regular shift, you can define the start and end dates through the Shift Calendar to ensure the change remains temporary.
- Go to Shift => Shift Calendar.
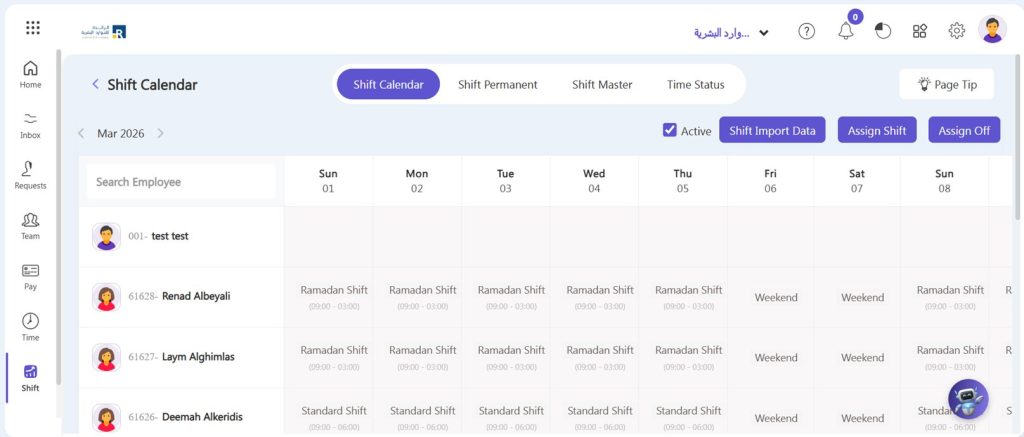
Using Click on Shift
- You can assign shifts to employees by clicking on shift name.
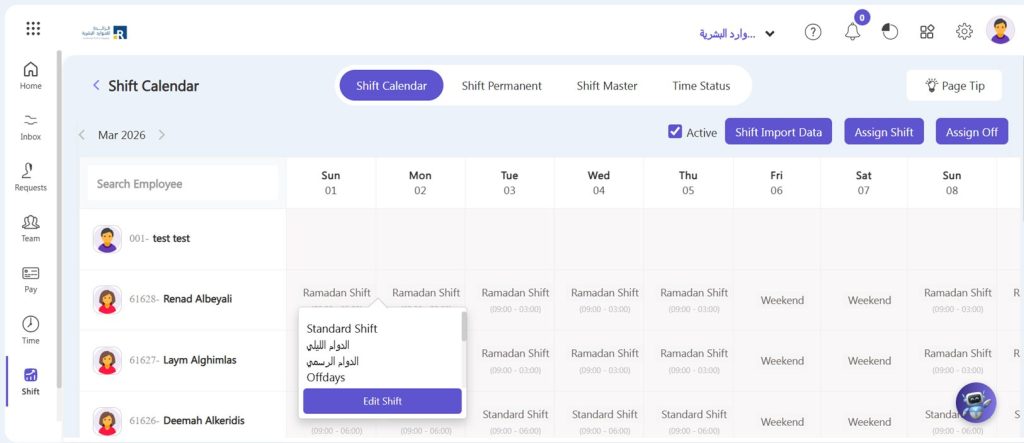
Using Edit Shift
- You can assign shifts to employees by clicking on Edit shift button.
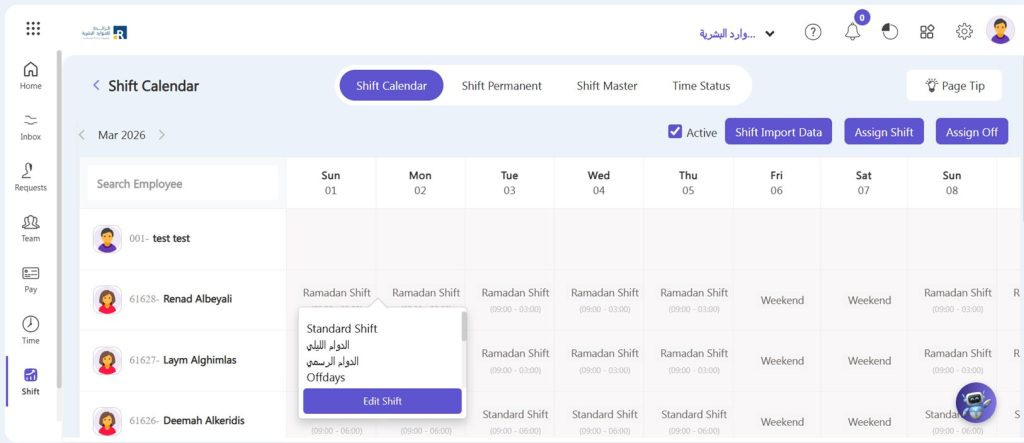
- After click edit shift button window will open select the Shift Name.
- Select From and to date.
- Click on Save Button.
- The shift will be updated on the selected range.
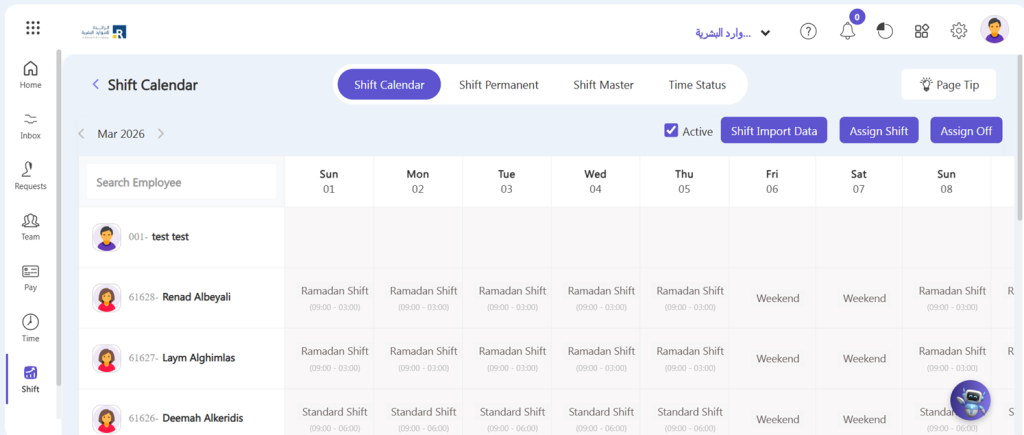
Using Assign Shift
- Click on the Assign Shift button located at top right corner.
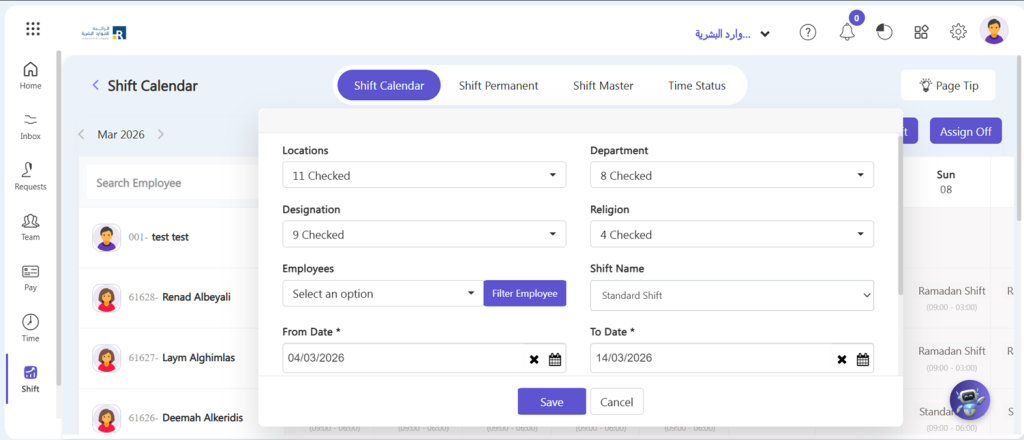
- Click filter employee and select employee names.
- Select the shift name.
- Select from and to date.
- Click on the save button.
Using Shift Permanent:
Use Shift Permanent option when you intend to make a long-term or official change in an employee’s shift. For instance, if an employee is permanently moved from the morning shift to the night shift, updating their profile through Shift Permanent will make the new shift their default going forward.
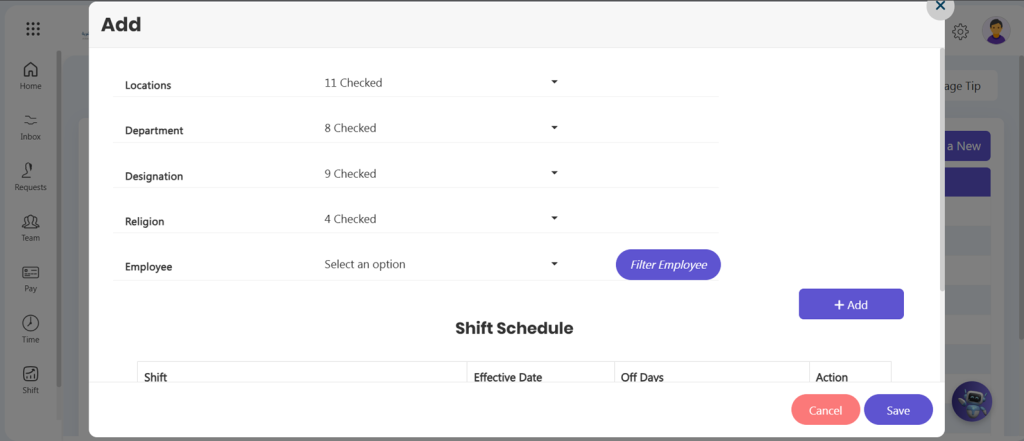
- Go to Shift => Shift Permanent => Click Create a New
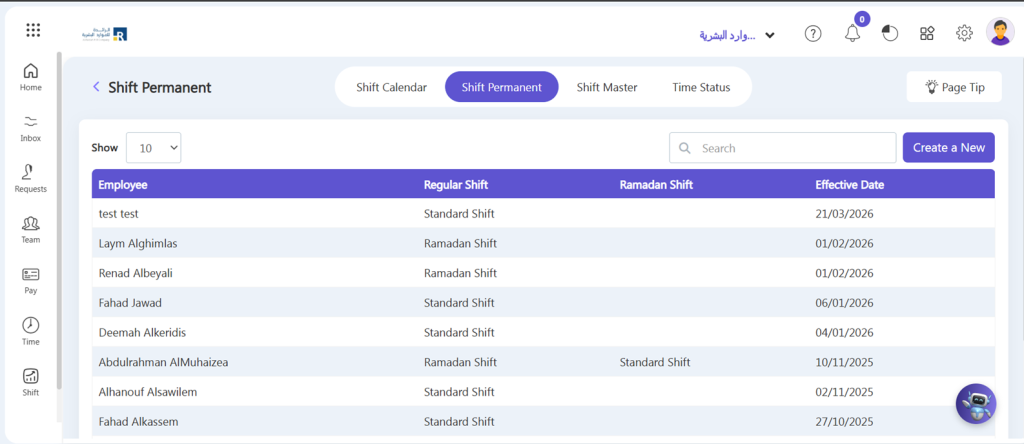
- Click Filter Employee, select shift, effective date and off days.
- Click Save.
Time Status in Ojoor
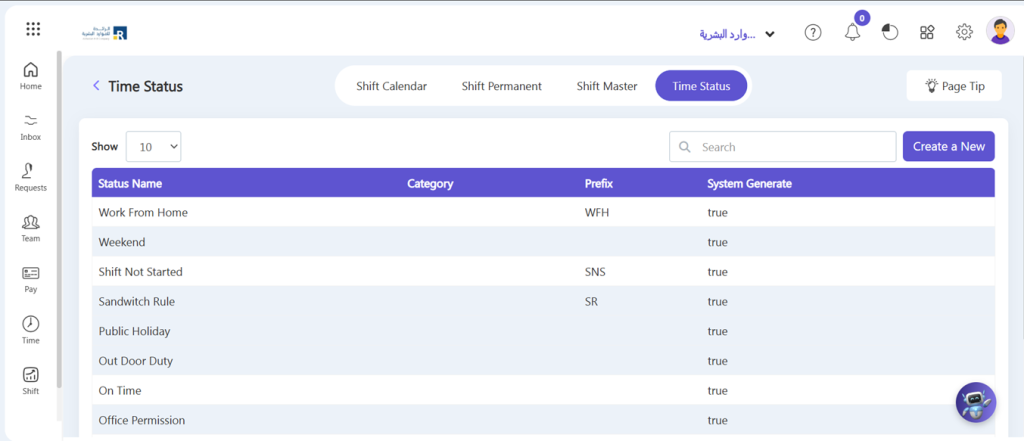
The Time Status feature in Ojoor allows you to create and manage multiple attendance statuses for employees. These statuses help categorize attendance records in a more detailed and organized way, making it easier to track employee working patterns.
How to Create a Time Status
- Navigate to Shift => Time Status => Create New.
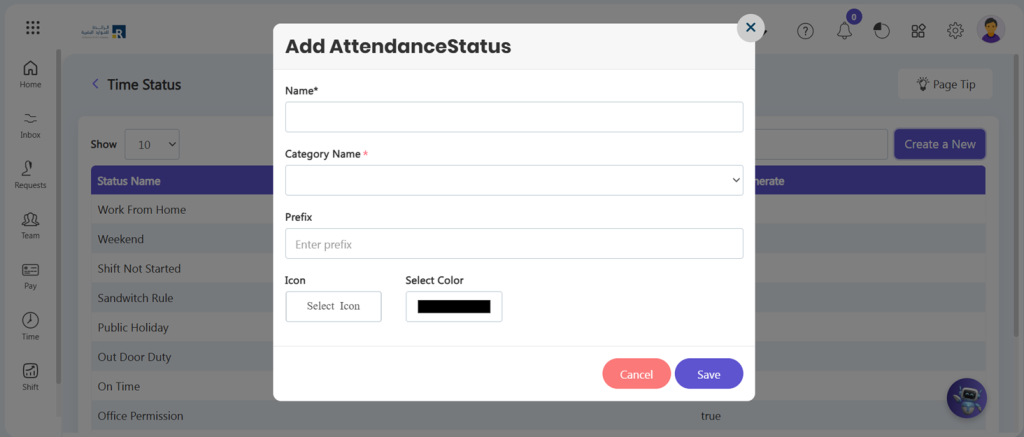
- Fill in the required details:
- Name – Enter the title of the status (e.g., Present, Late In, Early Out, Half Day).
- Category Name – Define the broader category this status belongs to.
- Prefix – Add a short prefix or code that will represent this status.
- Icon & Colour – Choose an icon and colour for easy identification in the system.
- Once all the fields are completed, click Save.
Utility
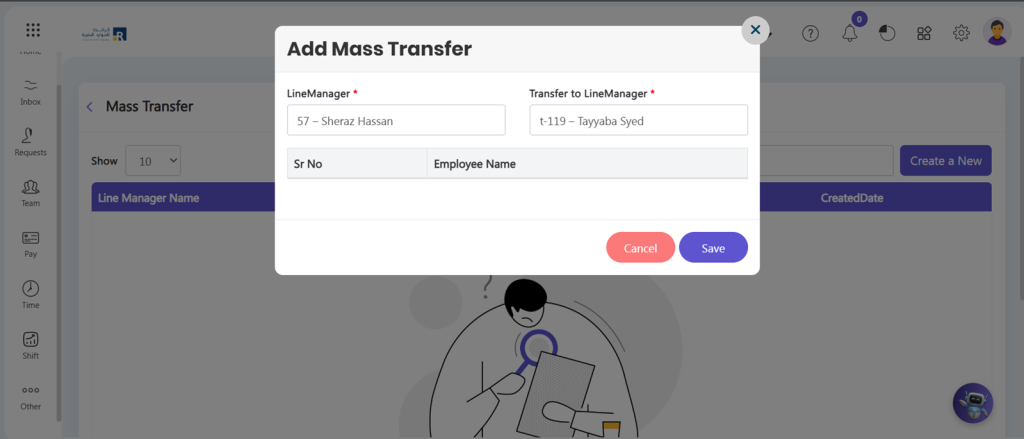
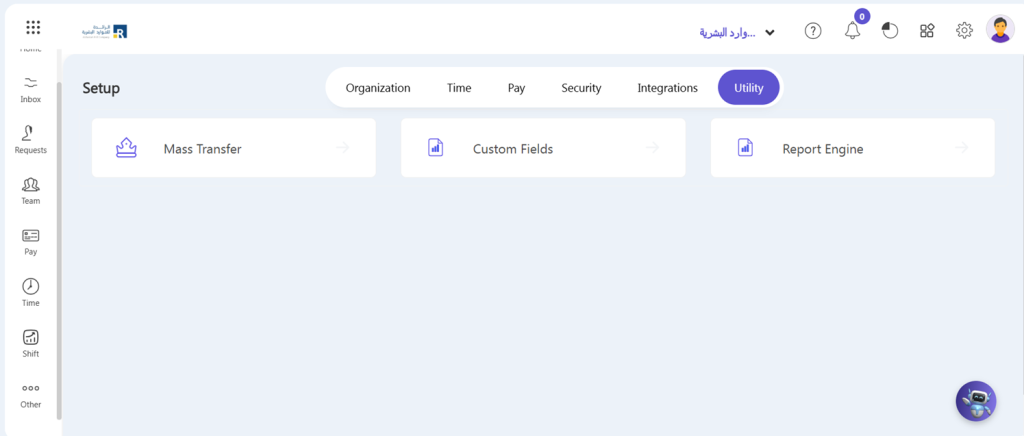
This feature in Ojoor HRMS is designed to streamline the process of managing reporting structures within the organization, especially when there are organizational changes, departmental shifts, or updates in leadership roles. This utility feature allows HR administrators to quickly and efficiently assign new line managers to multiple employees at once, reducing the time and effort required to make individual changes for each employee. To change line manager:
- Go to Setup => Utility => Mass Transfer.
- Click Create a New button.
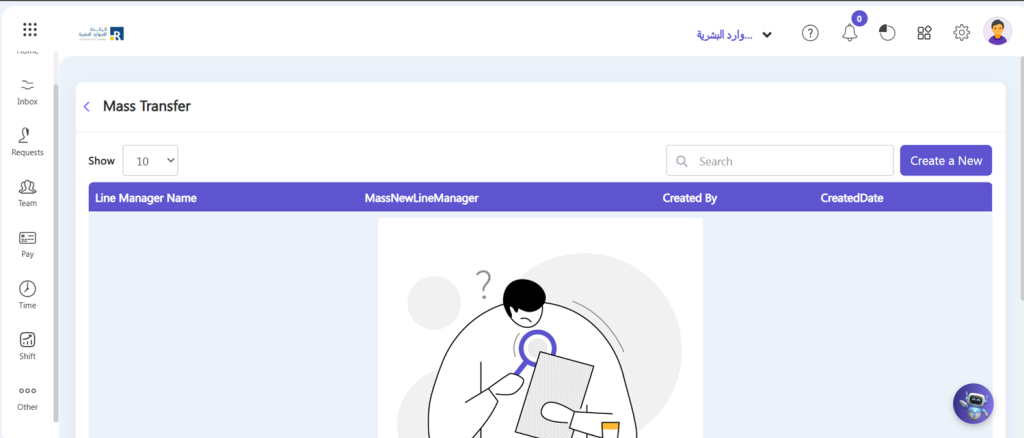
- In the Line Manager field, select the current line manager for the employees (e.g., 57 – Sheraz Hassan (existing line manager).
- After selecting the existing line manager, the system will automatically generate and display a list of employees who are currently assigned to that line manager. This eliminates the need for HR to manually add employees.
- In the Transfer to Line Manager field, choose the new line manager to whom these employees will be transferred (e.g., t-119 – Tayyaba Syed).
- Click save.